Do you want to start a new sportswear brand in your country? On a limited budget? And no experience? Or you have some great design ideas or a cool fashion workout apparel concept? Can’t you find the styles you are looking for? The time could be now for you to create your own personalized sports clothing line that brand you have been thinking of. But it’s difficult knowing where to start, or who to approach to get the ball rolling. If you want to start a sportswear label, then we at Sportswear Company Berunwear can help you every step of the way. Side by side with you. Read on this definitive guide and we’ll give you an overview of the 7 steps involved in starting your own sportswear business, and the knowledge that you have to learn about.
So let’s begin with a simple overview of the whole guide steps:
- Brand Direction
Find your sportswear niche. Build out your business plan & brand style guide. - Product Design
Get designing. Find a fashion designer who can bring your vision to life. - Quoting & Sampling
Shop for the right price & manufacturer and then start sampling. This takes patience and doesn’t be afraid to strive for near perfection. - Manufacturing
Time to push the button on bulk. 12 weeks will go fast, but you’ve got plenty to do in the interim. - Marketing
Build out a strong strategy and make sure you have a dedicated ad spend. Don’t let your hard work be invisible to your audience. - E-Commerce
Make the user experience as enjoyable as possible. And don’t forget your CTA’s. - Order Fulfillment
It’s flying out the door, make sure it gets there quickly and without hassle.
How to Start Custom Sportswear Brand From Scratch
Step 1. Brand Direction.
What is your sportswear niche?
Your brand still starts here, with an excellent idea. Maybe it’s not available yet, or even it’s, but you recognize you’ll roll in the hay better? How you’re getting to make it work remains weakened into these five criteria; Who, What, Where, Why & How. So, we’re getting to need you to require an extended hard look within the change room mirror and…
Ask yourself these 5 questions
- Who am I selling to?
Who is buying your products? What do they like and dislike? Know your consumer, conduct research, and be thorough. It’s great having a product people want, but do you know who that person is specifically? Build a customer persona and get friendly with them. - What am I selling them?
What is your product? What is your point of difference that is going to give you visibility to your audience? What makes your brand unique and different - Why do my who’s need what I have?
What does your audience need from your product that they aren’t getting from competitors? Why will it sell? Why is this product THE product they are going to spend their cash on? Know your product. Be confident in its release into the market. - Where will I sell my what to the who’s?
Where does your consumer spend their money? Online? Instore? Do they look at your products on mobile or desktop? Look into their spending habits and traits. - How will I market my what to the who’s?
Marketing strategy here we come! How are you planning on selling this product? Is your social media marketing strategy in line with your audience? How are you going to be memorable, build brand credibility and encourage loyalty? Now you’ve got you what, know your who, and where to find them – how are you going to get them to see it AND want it?
If you think that about it – these questions are just fleshing out your business plan. By now, you ought to have a name in your head… (Get started on your trademark application while you’re here too). The next step would be your Brand Style Guide. A Brand Style Guide is your branding bible. Built out by a graphic designer, it starts by creating your wordmark and icon. Think Nike and Nike tick.
From there it’s built out, but not limited to incorporate the following:
- Brand Logos – Wordmark and Icon
- Appropriate sizing, placement, proportions, misusage
- Brand Colour Palette
- Fonts – headers, sub-headers, and body copy
- Appropriate use across all branding – websites, emails, social media, packaging, stationery, official documents & POS.
- Brand Aesthetic – represented by relevant imagery
Those brands you love, their clean and cohesive branding – they follow a guide to ensure they stay within their aesthetic at all times.
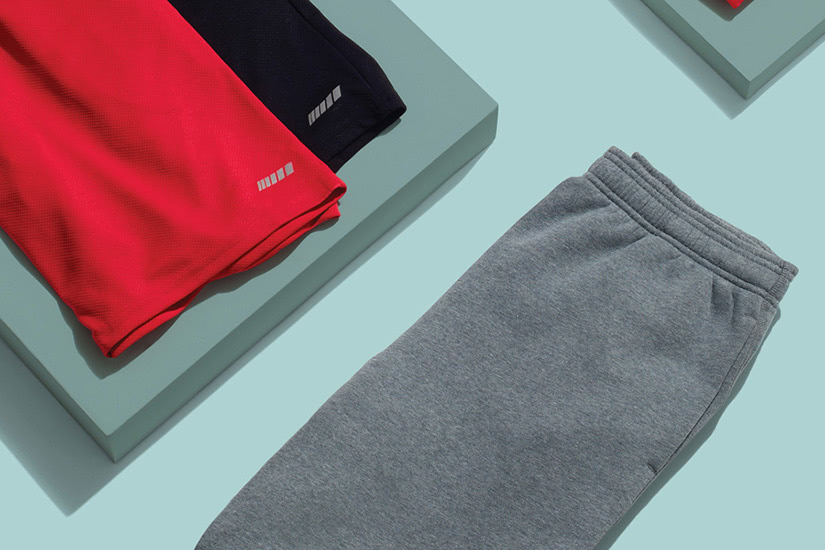
Step 2. Product Design.
Now, let’s take that dream product and put it on paper.
Visualise and then actualise it.

This is where you’ll get creative. Start a Pinterest board. Screenshot your fav Instagram looks. Collect swatches. devour a pad and pencil and obtain drawing. The creative process may be a fun one, and also a difficult one, you may wonder:
Do I need to know how to draw to start a clothing brand?
The short direct answer is No, you can start and run a successful brand without knowing how to draw, but for your sake and in the end, for the brand – yes it would help a lot if you could visualize your ideas. Here are some easy ways for beginners to get your design going:
- Use templates
You can use finished and downloadable Illustrator design templates that you can modify yourself. These can be changed to suit your needs. You can find design templates in the Apparel Entrepreneurship Membership Program.
- Outsource
Depending on how big your budget is, you can always hire a designer that can do the job for you. Visit Desinder.com to find a freelance designer all over the world. You will still have to explain your thoughts to the designer for him/her to do her job and start sketching the ideas.
- Learn to draw
If you want to be in full control and absolutely on top of the design process, then there are no shortcuts – learn how to draw. Practice till you can visualize your idea on paper or a screen. For hand-drawn sketches, you can use pencils, markers, watercolor, gouache, collage, whatever makes you happy and inspired.
- Use croquis templates
Other ways of doing it are by printing out tech pack sketches from the internet of similar styles and redraw them with your own designs on a lightbox. You already have the mainframe for the design and the proportions, adjust the length, width and redesign the lines to suit your taste.
Before we get into specifications, we’d like to travel through the planning process.
Be sure and assured in your designs, getting it right here will assist you afterward.
Once your design board is completed, it’s time to maneuver to the subsequent step – Design Packs.
What and why do I want this design pack once I’ve done my design board you ask? Well, for a slew of reasons.
A design pack may be a set of instructional documents made by your designer. this is often how we’ll offer you pricing and guidance to the manufacturer. This includes things like construction details, fabrication, colorways, brand labels, swing tags, print placement, print application, accessories, and far more.
Each design pack is predicated on your unique designs, no two are equivalent.
Without design packs, you won’t be ready to receive quotes from your manufacturer.
This leads us to step 3.
Step 3. Quoting, Sourcing & Sampling
Once your design board and packs are complete, you’ll now enter sourcing your fabrics and quoting your range.
By sending both your final design board and packs to manufacturers you’ll now make certain that the factory is obvious on what you’re looking to form and the way they will help. From here the factory can advise pricing, MOQ’s and lead times for samples.
Shop around, pricing varies greatly and is affected greatly by time of year, quantities, fabrics, and factory. Factories will concentrate on different things; some are going to be better at compression while others could excel in outerwear. Some may offer a lower MOQ for a better price. an honest agency will have access to multiple factories and be ready to cross costs for you.
But make certain to understand exactly what you’re getting for that price. Ask whether your factories are audited and if they follow moral and environmental practices.
Once you’ve received the pricing you’re proud of, it’s time for a few timelines and planning.

Build A Production Plan.
Now we’ve got a clearer understanding of what our garments may cost, we will re-evaluate – what’s needed, what’s not, and the way this plays bent end costs.
It’s important to notice though, all quotes when starting the sampling process, are just that – quotes. Fluctuations within the rate of exchange, fabrics, accessories & fair wages can change your end unit price. also as after sampling; final fabric consumption or changes to the garment will affect your pricing too.
But it shouldn’t be an excessive amount. Just something to remember and ready for.
Building a production plan out for everything you’ve got designed and are planning on releasing will assist you to lay it all down ahead of you. From prices, timelines, sample stages, and everything in between.
You may even find that this changes your initial concepts into split ranges or seasonal drops.
You guys still here? Yes?
Let’s prepare to sample.
Once you’ve got approved your design packs and quoting, the subsequent step gets a touch different.
Before we send it to the factory to sample, you would like your technical specifications. this is often your size grading, points of measurement/construction, and patterns. The last piece to show your design packs into fully-fledged Tech Packs (or Tech Specs).
These specifications are created by highly skilled Garment Techs whose job it’s to understand and tell the factory the way to make this garment. this suggests your samples and bulk are going to be as on the brink of what you’ve got designed as possible.
Garment techs have a microscopic eye for detail and belongings you might miss they’re going to see and amend for you.
It’s with the addition of those superstars, we will start to ascertain fit samples come closer to the finished product sooner.
Not only do they create your specs for your products, the standard controls all stages of the merchandise development process to make sure nothing is amiss.
They are invaluable to any good apparel brand.
Garment Techs and proper fit sampling processes mean fewer fit samples and quicker lead times for sampling generally.
While we’re discussing fit samples, let’s run through the various sorts of samples you ought to expect.
Fit Sample –
A fit sample should be measured and compared against your tech specs by your GT, both flat and on a mannequin. this is often to make sure an accurately constructed garment. it’ll allow you to ascertain any adjustments that require to be made for further sampling.
Rarely, a fit sample comes back 100% right the primary time, our standard is a minimum of 2. We don’t ever want to be moving forward into bulk without a fit sample being a minimum of 99% correct.
A fit sample is going to be made out of generally the proper fabric, perhaps not the proper color though, or sub-fabric – whatever is out there at the time within the factory sample room. the main target here is fit over aesthetics.
During the fit, sampling is where we might also source fabrics, accessories, provide strike-offs of prints, and lab dip custom-colored fabrics for approval.
Pre-Production Samples –
Once your fit samples are approved, including your prints & accessories, we will confirm a bulk order and enter PPS (Pre-Production Samples). A PPS is as on the brink of the finished product as you’ll get. it’ll be in your bulk fabric, with all the proper trims and prints. There shouldn’t be any changes at this stage. It’s just a touch preview of what the factory is close to making. you ought to even be ready to use these samples for a few marketing purposes.
Shipping Sample –
Shipping samples should ideally appear as if your PPS (otherwise we’ve problems). they’re taken from bulk just before it’s complete to point out that yes, all of the products are uniform and neat. Shipping samples must be approved before bulk is shipped from the factory. Sampling is usually an extended process, but it’s so important to develop your product to where you would like it to be before getting into subsequent steps.
Step 4. Manufacturing
We’re getting close, aren’t we?
You’ll soon learn with your first range that product development is a process. Maybe you have never seen how a performance t-shirt is made and let’s show you some scene of professional sportswear manufacturing:
What’s Embroidery
Custom embroidery is our most popular decoration method in general and for team wear. Some products that embroidery is most ideal for are custom team warm-ups, hats, baseball jerseys, letterman jackets, polo shirts, and team bags.
What’s Screen Printing
Custom screen printing is a close second to embroidery when it comes to customizing team wear and jerseys. Silkscreen printing is best for customizing t-shirts, hoodies, athletic shorts, practice jerseys, and compression shirts.
What’s Heat Transfer
Heat transfer printing is the decoration method for you if you’re planning on individually personalizing your teamwear with player names and numbers. Heat transfer is much more affordable than screen printing for individual personalization because you don’t need to burn a new screen with each use.
And while it certainly wasn’t hiccup-free, you’ve learned tons along the way – haven’t you?
Once you’ve approved your fit samples, we jump into our PPS. After your PPS is approved, we start production.
Full production, hooked into your products and range size, takes anywhere from 45 days to 12 weeks (+ 2 weeks for shipping).
Which leaves you with a while to line up everything else. Didn’t think you’ll relax for 3 months, did you?
Because we all know it’s not almost the merchandise anymore. We don’t want to offer you an excellent product then not assist you to sell it successfully.
During production you would like to consider numerous things; e-commerce, social media, and every one the opposite bells and whistles that make your brand, a brand.
Time to urge some visibility, credibility, and awareness out there.
This leads us to…
Step 5. Marketing
What does the farmer do with their product once it’s grown? They take it to plug and arrange it nicely on display to entice hungry patrons. they could yell savings and benefits repeatedly to interact and attract new customers, remember your name from your last visit to draw you back in, and even offer samples or incentives to urge you across the road.
And while marketing lately for your new sportswear range isn’t getting to be as simple as yelling at people to shop for your bananas, the tactics they use are often relayed over. Let’s breakdown some benefits of an honest digital marketing plan.
- Increase brand awareness/visibility
What’s the purpose of having an excellent product if no-one can see it?
Organically you’ll still be seen through SEO, with careful keyword planning and a few time. to ascertain results you’ll need patience, especially during a saturated market so confirm your content is sensible.
However, organic reach could be flogging a dead horse on other platforms, you’ll definitely pay to play. Think Facebook/Instagram ads, dynamic retargeting, and dedicate an honest ad spend thereto.
- Connect with your audience
You know your audience; you recognize why they need your product and now you’ve found them. Traditional marketing is gone, people don’t need a sales pitch; they need a story. Make the customer journey charming and personable, every point you connect – make it memorable.
- Expand your audience
Once you’ve begun to seek out your audience, start to create it into a community. Your target market shares common interests and hobbies, post engaging content that resonates not just together with your product but your brand’s identity to expand its reach.
- Growing your social media presence
Social Media may be a MUST. Utilize the relevant ones for your brand and be according to your posting and content.
Platforms to think about are Facebook, Instagram, YouTube, LinkedIn, Pinterest & Twitter.
- Increasing your sales
This is pretty self-explanatory. You didn’t create this brand for nobody to shop for it. So you would like to possess a robust sales-driven target.
Marketing is going to be an enormous part of your brand’s success or failure to grow. We know now that after you’ve manufactured your apparel, that getting it out there and seen by the proper people isn’t always as easy because it looks. Speaking of being visible, have you ever considered what e-commerce platform is right for you?
Step 6. E-Commerce
It has changed the way we shop, and although bricks and mortar are definitely not dead (I don’t care what you’ve heard), e-commerce is easily the best place to start selling your brand.
From larger reach to fewer overheads; the power to start small using a web platform means you aren’t limited by your location. Your audience is that the internet, as long as you’ve paid attention to step 5 and located them. There is such a lot that creates up an internet site. And a badly performing website can greatly affect your sales. Just like the customer experience is so important when you’re during a store, the user experience (UX) on an internet site is simply as vital to converting those sales. Websites got to load quickly, be engaging, easy to navigate, and straightforward to get.
And I want you to urge won’t to these three letters; CTA.
Call. To. Action.
Encourage the user to require action i.e. Shop Now, View The Range & Buy Now. Guide them to where they have to get on your page – the merchandise page.
So which platform is true for you?
E-commerce giants like Shopify are exceptionally user-friendly for the buyer and therefore the operator. The back-end platform makes handling stock a breeze. the choices are actually endless to customize and make your own, and there’s a plugin for almost anything you’ll want to feature. Do your research, check out websites you wish, and what makes the experience so nice and memorable to you. this may assist you to choose what’s getting to make your website great.
And now here we are, at our last stop.
We’ve had the thought. We’ve tested it. We’ve made the merchandise. Done our Marketing Plan. found out our e-shop. Now, where is our stock getting to go? and the way are we getting to send it.
Step 7. Order Fulfillment.
The beauty of starting a web sportswear business is that the bulk of it is often done from your laptop, anytime, anywhere. And for several of you, it’s a business you’re starting to eventually become your full-time job. But that doesn’t mean you continue to aren’t doing the daily grind.
So, unless you’re planning on opening your own warehouse or filling your garage floor to ceiling, you would possibly want to seem into third-party storage and distribution. From picking, packing, storage, returns, stock counts, and beyond – it allows for consistency for your customers and you. to not mention discounted shipping rates directly from the warehouse thanks to their existing relationships with freight companies. In a highly competitive space like e-commerce, you would like to make sure your shipping and returns are quick and painless. Savvy shoppers will look out for the simplest rates and straightforward policies when buying.
And that brings us to the top of the seven steps. Do they appear too high to climb? Not to worry, we don’t expect you to try to do it alone.
That’s why we’re here.
From developing your idea, finding the right custom sportswear manufacturer, building your website & marketing plan, and even your storage & distribution. 2021 was huge for sportswear and that we listened to what you guys needed to achieve success.
And don’t forget to comment below and let us know any questions or stories you have.